Composting is an excellent way to reduce your waste and create rich fertilizer for your garden. The best part is that composting is not even that hard to do. All you need is a little space, time, and a few know-how answers for troubleshooting should something come up. But you don’t want just a pile of stuff sitting in your backyard.
There are plenty of different types of compost bins you could have. One of the most cost-effective ways to start a good compost pile is to construct a wood pallet compost bin.
Consideration before making pallet compost bin
Exercise caution when choosing the wood pallets for making a compost bin. Stay away from pallets that have MB (methyl bromide) stamps. They are treated with pesticides that are toxic to your plants. Instead, go for the heat-treated pallets.
Consider making a compost bin with several sections. That way, you can have the first section for pilling organic matter, the next for active compost, and the last for the ready compost. So that gives you an easy time.
Besides, you can have a roof for them. A cover is vital as it prevents the excess rain from soaking the compost and, hence messing the decomposition process. For easy access to the pallet compost bin, you can incorporate hinges.
Sometimes the spacing in the pallet may be extra-large and thus lets out the compost. You can solve the problem by adding wood slats to the large spaces.
Pros and cons of pallet compost bin
Before making a pallet compost bin, it’s wise to weigh out its pros and cons.
Pros:
- The wood slats have gaps in between that let in oxygen to the decomposing pile.
- It’s pocket-friendly. Pallets are easy to source from local stores and loading docks. On top of that, you only need corner brackets, screws, and hinges.
- Making DIY pallet compost is fun. You’ll almost certainly enjoy every step in the project.
- Wood pallets are usually large (for example, 4 feet by 4 feet). So it makes up a spacious pallet compost bin that’s ideal for hot composting.
Cons:
- The open spaces between the slats make them less ideal for winter unless you add insulation.
- They require a considerable amount of organic matter and thus suits large gardens only
- The pallet bins attract heavyweight. So, pallet bins require more effort to move or load to the car.

Are pallets safe for compost bin?
For the most part, yes, a diy compost bin from wooden pallets is safe as long as you take in a couple of factors.
Pallets are made from wood, and sometimes that wood is treated with chemicals so that bugs don’t get into them. These chemicals aren’t suitable for your plants or yourself, and so you’ll want to avoid them.
This is pretty easy to do as most pallets contain a stamp on them saying where they’re from, how they were treated, the inspector who cleared the pallet for use, and additional information.
The chemicals used, Methyl Bromide(MB) and Sulfuryl Fluoride, are highly toxic and shouldn’t be used in DIY pallet projects. You should only use heat-treated or kiln-dried pallets for any projects you have in your garden.
What type of pallets do you need to make a DIY compost bin?
The best pallet should present a uniform size and be rot resistant. That way, you won’t require resizing or cutting the pallets before joining them. Pallets are of varying sizes; get a uniform size that suits your garden.
Further, the type of treatment on the wood matters. The best option is to use the wood pallets with HT (heat treated) because these are safe for the garden and home. HT pallets are regulated by ISPM 15 (International Standards for Phytosanitary Measures), which requires the wood is debarked, heat treated and stamped.
You can also look for the markings on the wood such as IPPC, EPAL and KD (kiln-dried). Such markings mean the treatment of the pallets doesn’t involve any toxic chemicals.
In addition, the MB mark (also known as methyl bromide) is a bad sign. Avoid MB stamped pallets because such wood treatment involves toxic pesticides.
How to make a compost bin from pallets
If you like to DIY, here is a short video summarizing the essential tips.
Materials You’ll Need For Your Compost Bin
When it comes to DIYing your compost bin, all you need are pallets and straw bales wire or zip ties, but there are a few optional items you might want.
Required Materials:
- Four pallets that are the same size
- Zip ties or wire for connecting the pallets
- Spade or rake
- Hammer
Optional Materials:
- Chicken wire or hardware cloth
- Nail gun
- Staple gun
- Carpet or tarp
- Wooden stakes
- Wood stain
- Hinges
- Burlap
1. Prepare Your Location
The perfect location for your compost bin should be on level ground and out of the way of any other gardening work that might go on. Use a spade or rake to ensure the ground is level and pull up any large rocks that might be there.
You don’t want to put your compost bin too close to any trees where roots can grow and take advantage of your compost.
2. Prepare Your Materials
You should inspect your pallets for loose planks and protruding nails. Protruding nails must be either hammered back into place or removed and new nails put in to keep the planks stable.
This will help ensure there are no accidental injuries while you’re putting your compost bin together.
Afterward, you should rinse your pallets so that any spills on them get washed away. For troublesome residue, a good scrubbing should do the trick.
3. Create Your First Wall
Decide where you’d like the back wall, stand your first pallet up, and get it into position.
Depending on how high or wide you’d like your compost bin will determine if you’ll be standing your pallets up on their ends or their sides.
4. Creating a Horseshoe Shape
Get your second pallet into position and tie it together with the first one using zip ties or a nail gun or electric drill if you want to make sure it’s secure. Secure both the top and the bottom of both wall pallets so they can’t easily come off.
If you’re using zip ties, you might need to put two together, so it’s long enough. After you’ve secured your walls in place with either zip ties or wire, make sure your corners are at right angles, and they can stand up by themselves.
This makes sure it can withstand whatever Mother Nature throws at it without too much trouble. That is unless she decides to throw it completely out of your yard, which has happened to me.
If you’re using nails or screws, make sure that it’s level and the walls of your compost bin a perfectly perpendicular before you permanently attach them because it is a pain to remove and redo.
5. Putting on the Door
There are a couple of different ways to put on the door.
The easiest is to zip tie or wire one side of the fourth pallet onto the rest of your masterpiece. Then add zip ties underneath the first slat on the opposite wall and then have a nail or a piece of wood coming out of the door for you to hook it around, keeping the door shut.
The other way is to add actual hinges and a latch for a nicer look. This takes hinges, screws, and an electric drill but is pretty quick and easy.
Putting on a door is optional as there are plenty of three-sided compost bins. However, it doesn’t look as nice. It’s real easy for animals to get into your heap, especially if you’re putting kitchen scraps in your compost.
6. Keeping Compost in and Critters Out
Speaking of critters, if you want to make sure your compost is safe from rats, squirrels, or even raccoons, I suggest chicken wire or hardware cloth.
Line the inside of your pallet before you start composting to keep them from getting in. You might even want to cover the ground so rats can’t dig tunnels to the compost bin. This also has the benefit of keeping your lawn clippings and smaller yard waste in the bin.
Also, you might want to cover the top of your compost bin, especially at night. Again, a simple tarp or even some carpet can help with that.
7.Optional: Measures for Stability
If you want to make sure your pallet compost bin is safe when you put together your pallet, and your pallets are on their end, you can hammer wooden posts in between the two sides of the pallet.
This is great if you’re in a place with high winds or the regular threat of Mother Nature throwing your compost bin into the next county. Not saying it won’t still happen, but she’ll have to try a lot harder.
If you’ve placed your pallets on their sides, you can hammer stakes into the ground at the corners before screwing the two together. It’s a good way to ensure your compost bin isn’t going anywhere.
8. Optional: Making It Look Pretty
If you want your bin to be pretty, there are plenty of options you can do to make it look less like a place for a compost pile.
One of the ways you can do that is by staining the outside. Only stain the outside as you don’t want any of those chemicals getting into your compost.
You can also add flower planters.
If your pallets are facing up, then you can get a length of burlap that hangs about a foot on either side of your compost bin and cut small holes for where the braces are. Then feed the burlap into the holes before stapling it to both sides of the pallet. Trim the excess, add soil and flowers, and tada! You have a pretty pallet compost bin.
If your pallet is sideways, then you can find flower planters to hand off of it or screw into the side to add a touch of pretty to your compost bin.
FAQs
How to use a pallet compost bin
For better organization, a three-pallet compost bin is ideal. Assemble all the fresh organic materials in the first bin. When collecting the materials, you need both the browns and greens in a balanced ratio.
Some sources of browns are dried leaves and tattered cardboard. On the other side, greens include kitchen wastes and grass clippings. The right balance of browns and greens is vital for speedy decomposition.
Once the first bin is full, transfer it to the middle section and allow it to rot. When the decomposition process is complete, transfer it to the last bin. The third bin is for ready-to-use compost manure. Such an arrangement of pallet compost bins makes up for easy work of preparing compost.
How Long Do Pallet Composts Last?
Pallet composts generally last four to six years as long as they don’t have a bottom. If you put a base on your pallet compost bins, you’ll need to replace it every year or two.
Should a Compost Bin Be in the Sun or Shade?
Either sun or shade can work just fine. However, having your wooden pallet compost bin in the sun will speed up the composting process. This is because both heat and moisture are required to break down the materials you add to the compost heap for finished compost.
Final Words
Out of all the ways I’ve tried to compost over the years, pallet composting is by far the easiest. It’s not only versatile, but it’s one of the most cost-effective ways to turn garden waste, food scraps, organic material, grass clippings, and kitchen scraps into a nutritious feed for my plants.
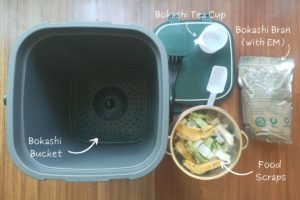
However, if you want to find other options instead of DIY pallet compost bins for your big garden, compost tumbler, worm castings and bokashi composting could be good choices.
You may enjoy these related articles: