Backyard composting is an excellent way for the average person to responsibly deal with waste in the home, whether it be yard waste, recyclable materials, or food scraps. It has excellent benefits for the earth and the garden by enriching the soil with coveted nutrients.
There are numerous backyard composting methods to choose from. For someone unfamiliar with composting, it can be stressful to decide which method will provide you with the largest number of benefits without breaking the bank. It’s also difficult to know what waste is acceptable to compost and what isn’t.
Some backyard composting methods are a little easier to maintain than others and require less know-how right out of the gate. Consider which method fits best with your level of expertise.
You will also want to take into account the space you have to compost. Do you have room for a large compost pile, or do you have neighbors close by who might complain about the smell?
Finally, select a composting method that fits within your budget. Some methods require higher upfront costs, while others can cost money over time.
Today we will introduce 4 most popular backyard composting methods for your reference.
While not the cheapest backyard composting method, a compost tumbler is an excellent choice for beginners looking to reduce waste responsibly.
A compost tumbler, or tumbler bin, is a sealed container that sits up off the ground and can be manually rotated, either with a handle on the side or from its base. They are primarily made of plastic or metal and have built-in holes across the body for ventilation.
The more frequently compost is turned, the faster it turns into a usable material that can be returned to the garden. With a compost tumbler, the sealed container allows the organic matter inside to reach the right temperature faster. Additionally, its rotation feature makes the contents mix together
Many gardeners find a tumbler makes the entire composting process much easier than other methods they’ve tried.
There are several reasons why a tumbler is a good option for backyard composting.
Composting in a tumbler is simple. You need only fill it with the appropriate mix of brown and green organic material, close the lid, and rotate it to mix the contents.
You should rotate compost in a tumbler at least once a week for maximum aeration and the fastest turnaround time.
There are hundreds of tumbler options to choose from, with starter compost bins priced as low as $60. Larger models can be found for upwards of $360.
For a slightly more out-of-the-box composting method, consider trench composting.
Trench composting is the method of burying small piles of organic waste in the soil.
Also known as the “lazy man’s” composting method, trench composting is a fairly hassle-free way to turn waste and organic matter into soil-enriching side-dress
There are a couple of ways you can begin trench composting. The method you choose ultimately depends on your space and composting goals.
The most traditional trench composting method is referred to as the “dig and drop” method. After gathering your kitchen scraps and food waste, dig a hole approximately a foot deep, ideally in a bucket or composting pail. Drop the compost material directly into the hole, leaving about 6 inches at the top of the hole, and fill it in.
The side-dress method involves digging holes several inches away from the roots of your existing plants and burying the compostable material inside of them. This method gives your plants an immediate influx of nutrients as they grow and the organic material decomposes. It is important to be mindful of how far away from the plants you dig holes to avoid damaging the root system.
Trench composting requires minimal cost. You only need a shovel, a compost pail, and a little time to devote to digging.
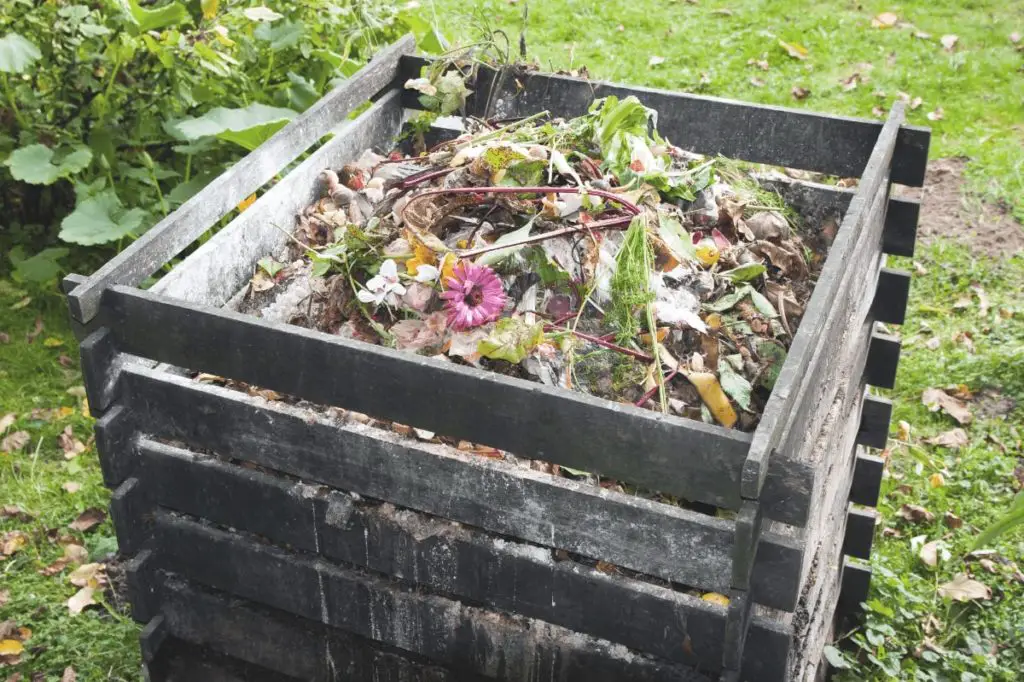
Another budget-friendly composting method with excellent results is the wire compost bin.
Wire bins involve placing all of your composting material into an open-air composting bin made of wire mesh panels. The pile of decomposing food waste and carbon-rich brown material
Wire bins can be purchased pre-made or built with materials you buy yourself. If you choose to build your own, you will need to purchase wire fencing, wire cutters, and wire or twine to adhere the wire fencing panels together. Zip ties would also work in a pinch.
Once your wire compost bin is built or placed in your chosen location, you simply apply a good mix of brown and green organic material to the bin and turn the pile regularly. Finished compost can be applied anywhere in the garden.
Pre-made wire bins cost an average of $30-50. If you go the DIY route, you should expect to spend around $25-30.
When people think of backyard composting, they often picture the pallet bin.
A pallet composting bin reuses shipping pallets to create the compost bin structure. It’s a great way to recycle existing material that typically gets thrown away.
The material in a pallet bin is exposed to the open air and requires regular manual turning to keep the pile properly aerated.
Those who use this method build three bays to represent each stage of composting. For example, the first bay is where all new material is placed. This includes your kitchen scraps and food waste. The middle bay is material that has decomposed down, while the final bay is finished compost.
With a pallet compost bin, you will want to start off by finding an ideal spot in your backyard to build it. You will want it close enough to the garden or house that you’ll continually use it, but not so close that you have to deal with unpleasant odors emanating from the pile.
Once you’re ready to begin composting, you will need to create a bottom layer of brown material–dried leaves, cardboard, or newspaper– and combine it with a healthy mix of green material like food waste, grass clippings, or other yard waste, and kitchen scraps.
Over time, as the organic material present in the compost breaks down, you will need to move the piles to the appropriate bay to maintain the system you’ve set up.
Unlike pre-made compost bins, the pallet bin method requires little upfront cost. First off, most businesses throw out their used pallets and will gladly give them to interested parties for free. After that, all you need is a smattering of tools to construct the bin structures, which you likely already own. Then you’re ready to start composting.
Recommended reading: 8 Simple Steps to Make a Pallet Compost Bin
Although there are general rules to composting that can help ensure a successful, healthy finished compost, there are many natural factors that can play a role in how a finished compost turns out.
While some odor is to be expected with decomposing organic material, in general, your backyard compost pile should not give off offensive smells.
If you are experiencing the smell of rotten eggs, the material in the compost pile isn’t getting enough oxygen and needs to be turned over.
The smell of ammonia can also indicate that your compost pile is emitting excess nitrogen, often the result of adding too many green materials. To remedy this, simply turn it and mix in more brown and carbon-rich material like straw, sawdust, or uncolored cardboard.
If your compost pile isn’t getting hot enough, the pile may have been left unattended for too long. It is also possible that there is not enough nitrogen-rich material or oxygen present.
To heat your backyard compost pile, you can try turning it to introduce some fresh oxygen or adding in green material for a boost of nitrogen. It is also advisable to address the moisture content of the pile. If it is too dry, wet it down by hand.
Moisture is a key component of a successful compost pile and one of the most common composting problems.
Many gardeners find their backyard compost pile is too wet, which can prohibit oxygen and keep important microbes from thriving. This is usually a result of an overabundance of materials like grass clippings and vegetable scraps which have high water content.
To fix this, it is necessary to turn the pile well. You will also need to add in a good mix of dry materials to balance the green material currently in the pile.
Backyard composting may seem like a complicated endeavor that requires a lot of space and technical know-how. In reality, setting up a composting system in your backyard is easy to implement and has many benefits for your garden and the soil. There are also a variety of options for budgets of all sizes.
Ultimately, backyard composting helps reduce food waste in landfills and adds necessary nutrients back into the soil for a healthier earth.